To view larger versions of any photograph, please click on the thumbnail images shown below. Each image is accompanied by a caption that contains a short description of the photo.
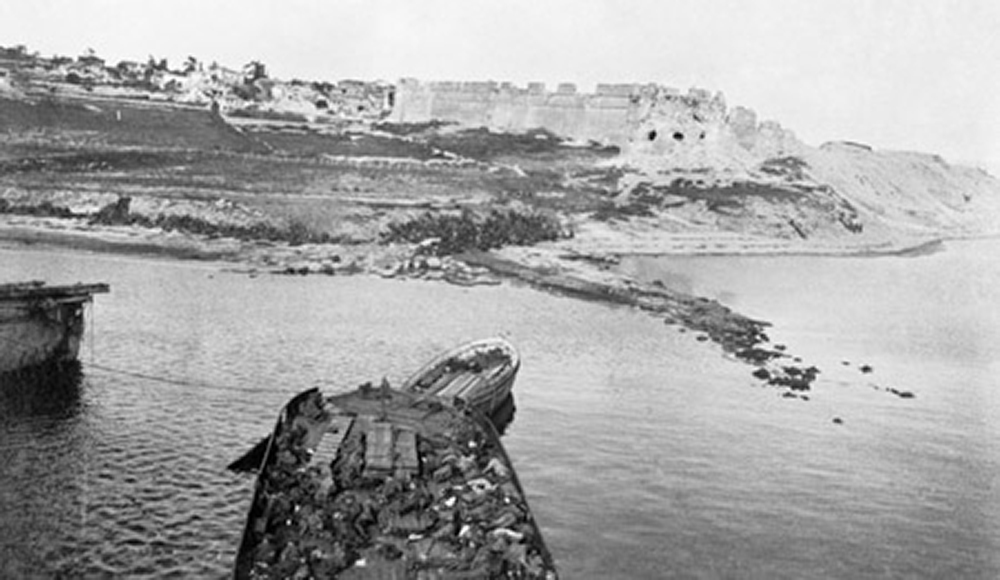 On 25 April 1915, British, Australian and New Zealand troops landed on a series of beaches around the tip of the Gallipoli Peninsula in support of the Royal Navy's attack on the Dardanelles. Here at V Beach, the British suffered particularly heavy casualties. Dead and wounded can be seen on the boats and by the water's edge, while survivors shelter on the beach.
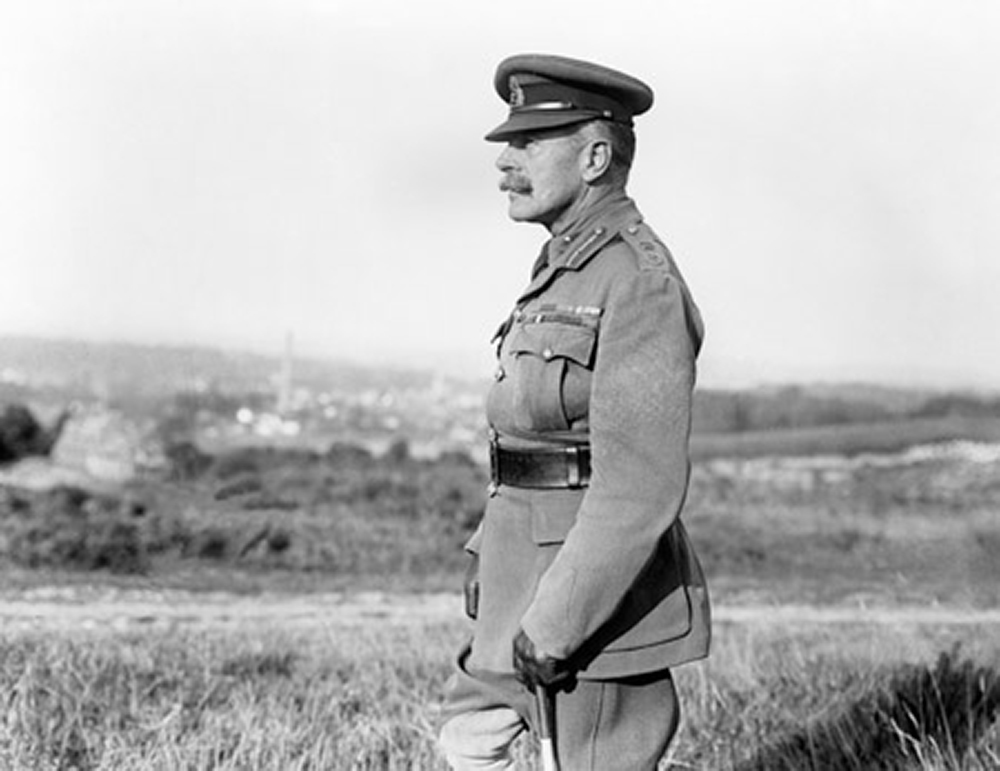 Field Marshal Sir Douglas Haig was Commander-in-Chief of the British Expeditionary Force from December 1915 until the end of the war. Opinion about Haig remains sharply divided. Much admired by his men at the time, he has recently been criticised as a 'butcher' and 'bungler'. But modern scholarship shows he was an able commander who played a key role in achieving victory in 1918.
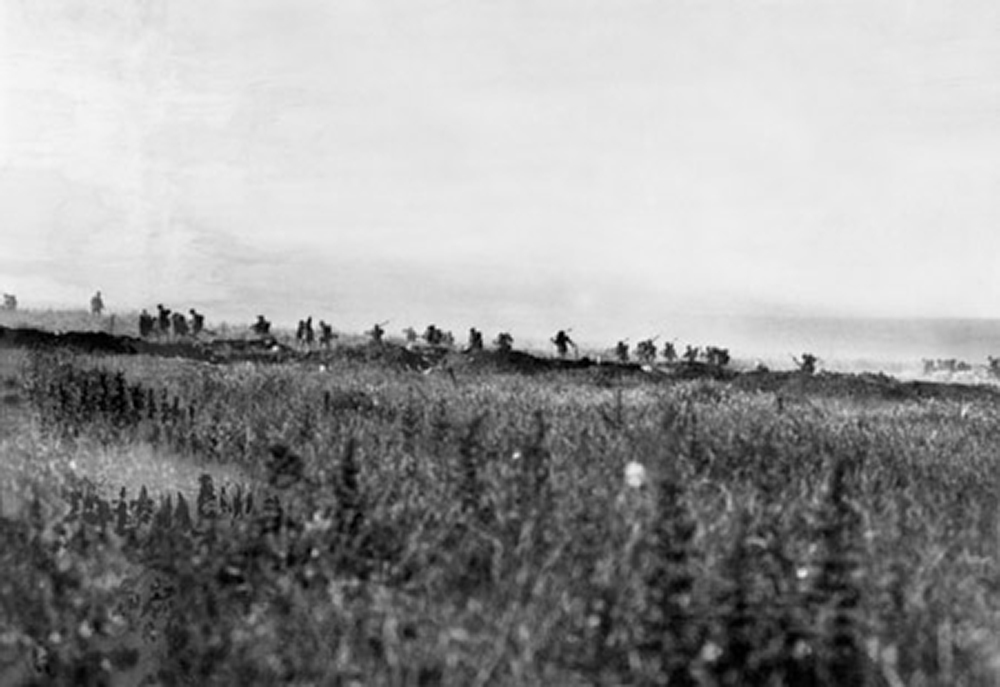 The main British battle in 1916 was fought north of the River Somme between 1 July and 19 November. It is now perhaps best remembered for its heavy casualties. On the opening day the British army suffered its heaviest ever losses in any 24 hour period: almost 20,000 dead and 40,000 wounded, including 6,300 from the 34th Division, shown here on the first morning.
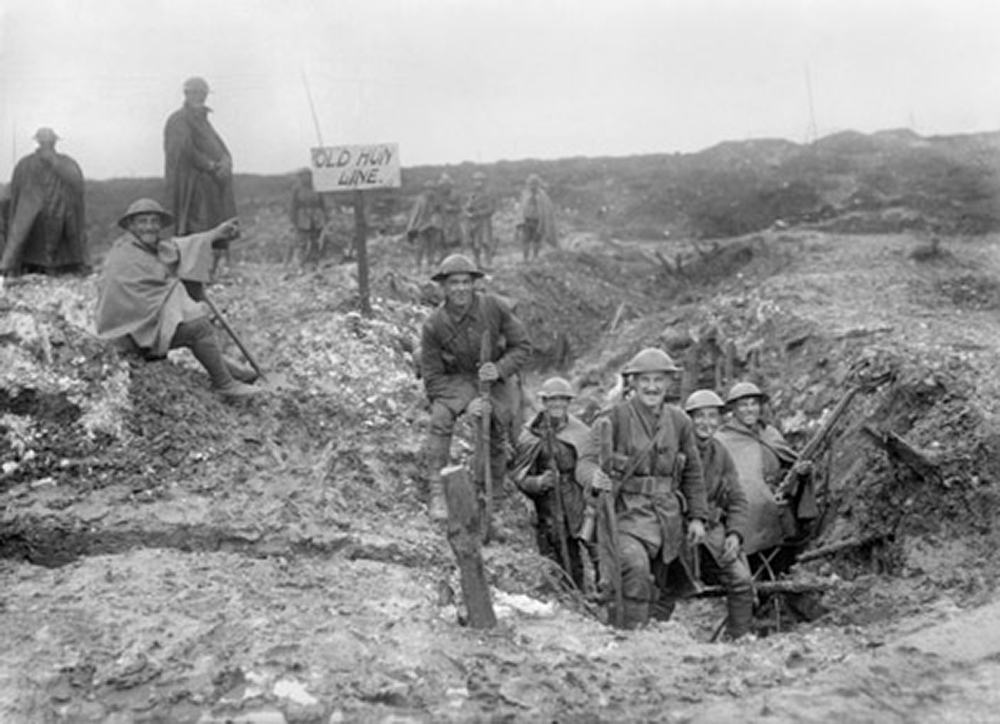 As a result of their casualties on the Somme, the Germans built strong, new defensive lines opposite the British in France. Beginning on 25 February 1917, over several weeks they pulled back around 40km (25 miles) to what the British called the Hindenburg Line. British troops pursued them through villages like Serre (seen here) that they had been unable to capture the previous year.
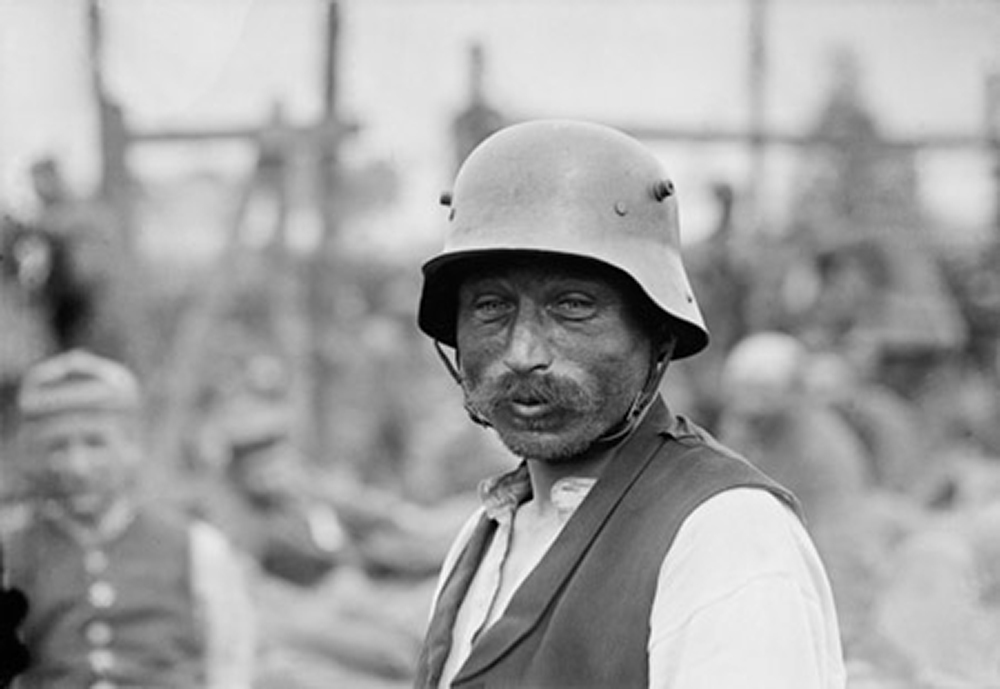 In the summer of 1917, the British launched a new attack in Belgium against the Messines Ridge. After a lengthy bombardment, at 3.10 am on 7 June, nineteen huge mines were exploded under the German trenches which were quickly captured. The exhaustion on this German prisoner's face shows the strain of living through the assault.
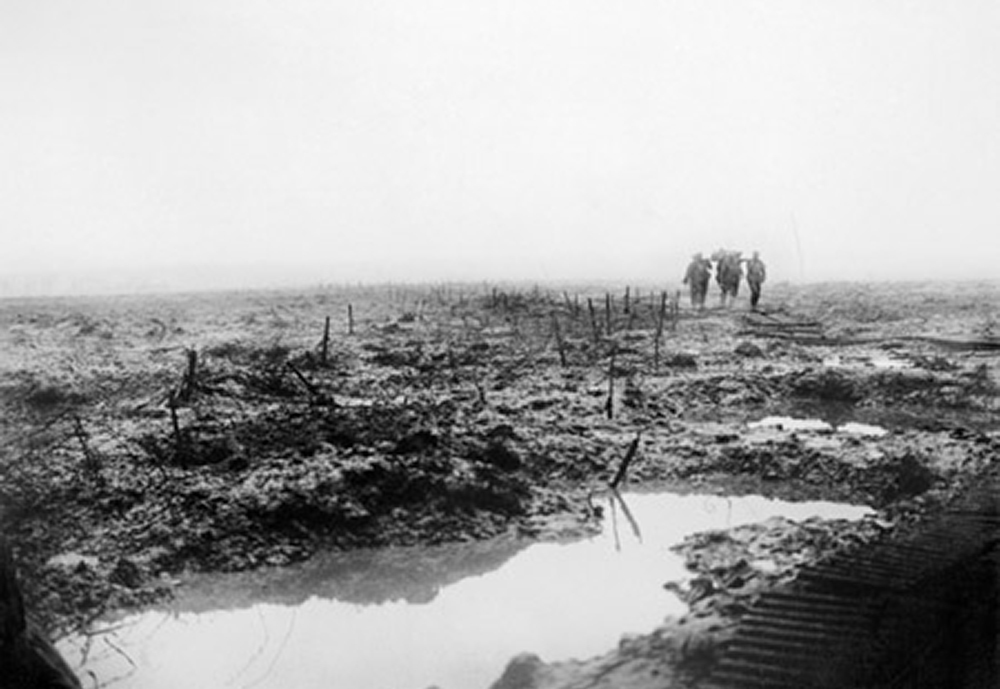 The main British offensive in 1917 was at Ypres against the Passchendaele Ridge, undertaken between July and November. Unusually heavy rain fell. Stretcher bearers, like these Canadians on 14 November, struggled to bring back the wounded. Passchendaele's water filled shell holes and devastated battlefields have become one of the most powerful images of the war.
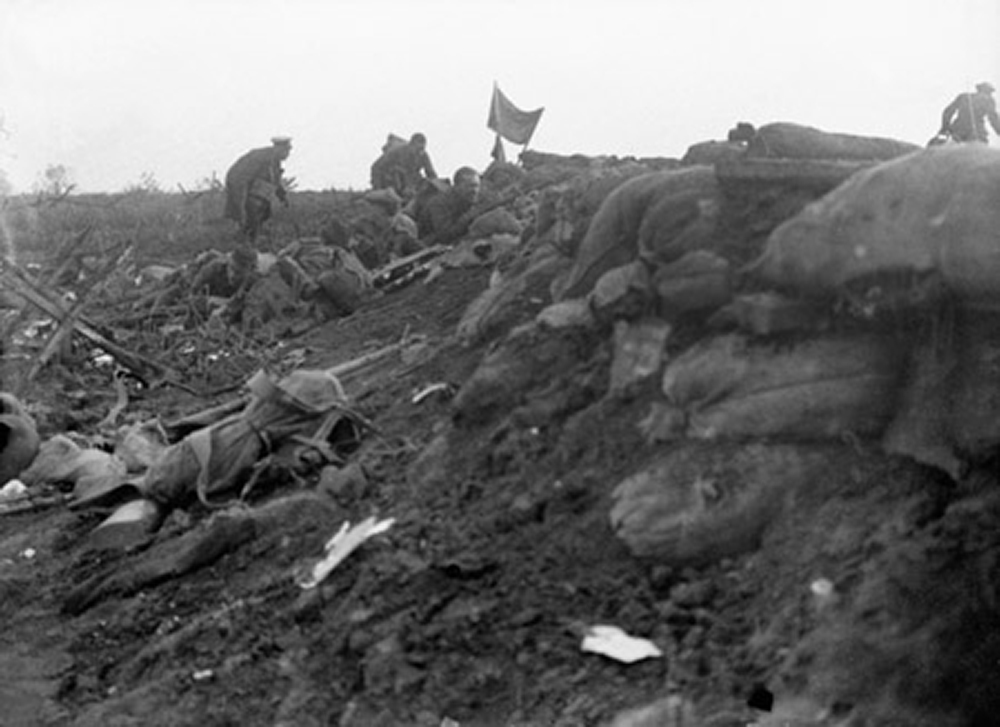 Genuine battle photographs of men under fire are rare. This one shows the men of the 1/10th Battalion, King's (Liverpool Regiment), known as the Liverpool Scottish, in the middle of an attack at Bellewaarde outside Ypres on 16 June 1915. It was taken by Private Fred Fyfe, a pre-war press photographer as he lay wounded.
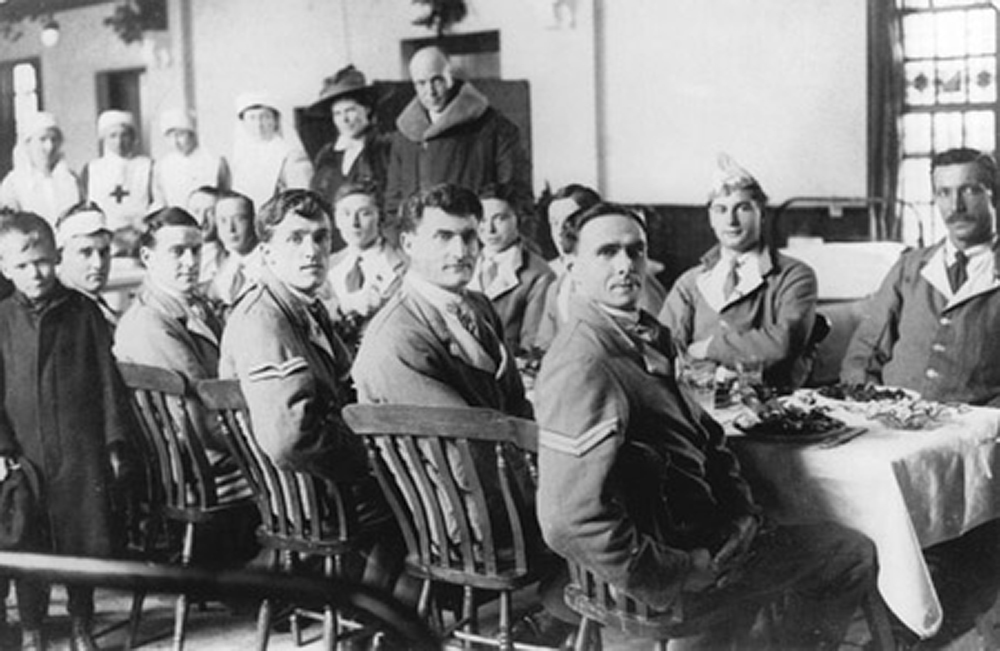 A view taken inside the Wesley Hall of the 1918 Christmas festivities. The patients are wearing 'hospital blues'. All soldiers sent to hospital were ordered to remove their khaki uniform and change into a suit of blue clothes worn with a red tie. The suit became a badge of honour, as it marked the wearer out as a wounded soldier.
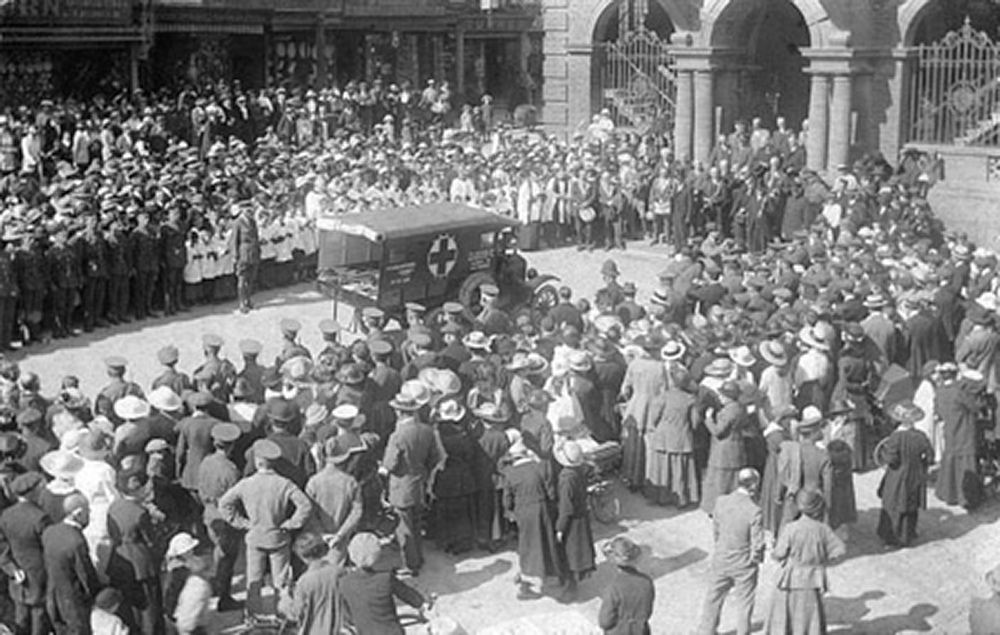
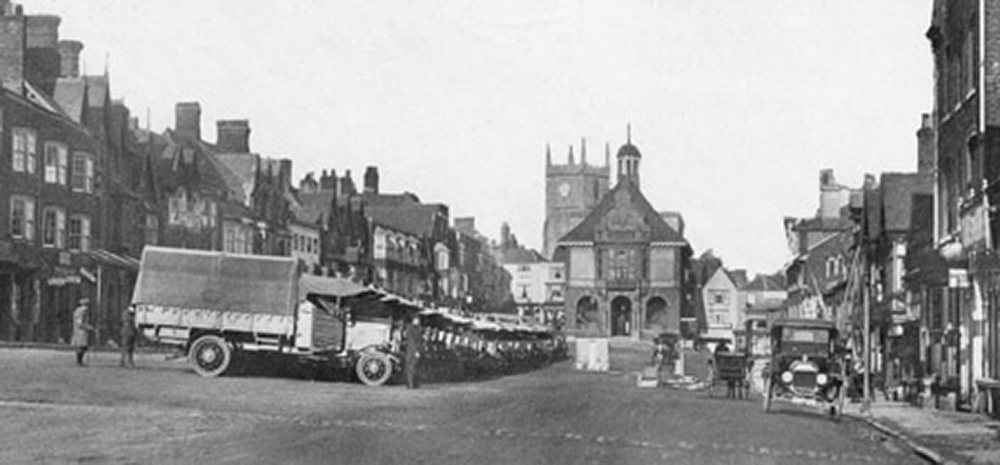
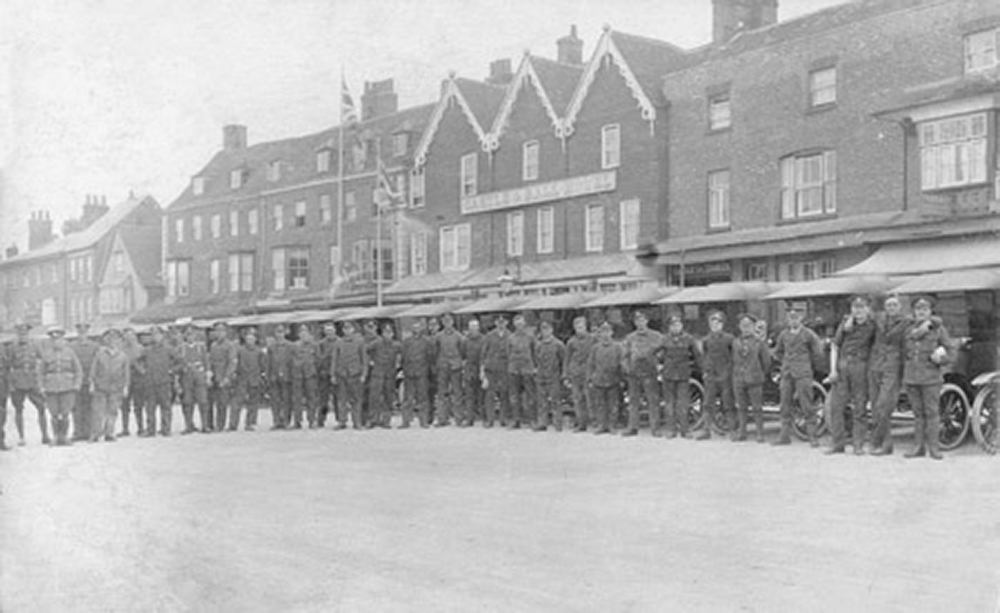
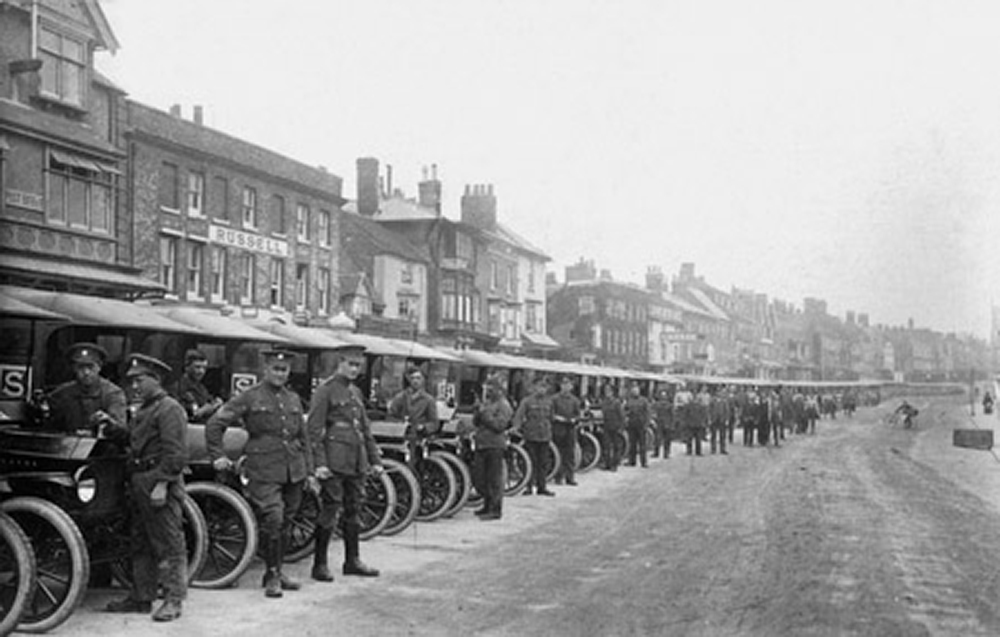
Presentation Ambulance – On the afternoon of Saturday 18th August 1917 the presentation of a Red Cross motor ambulance to the Army took place outside Marlborough’s Town Hall in the High Street. The money needed to purchase the ambulance had been raised by members of the Swindon, Marlborough and Devizes lodges of the Royal Antediluvian Order of Buffaloes (RAOB) who were working hard to raise more money for a second vehicle.
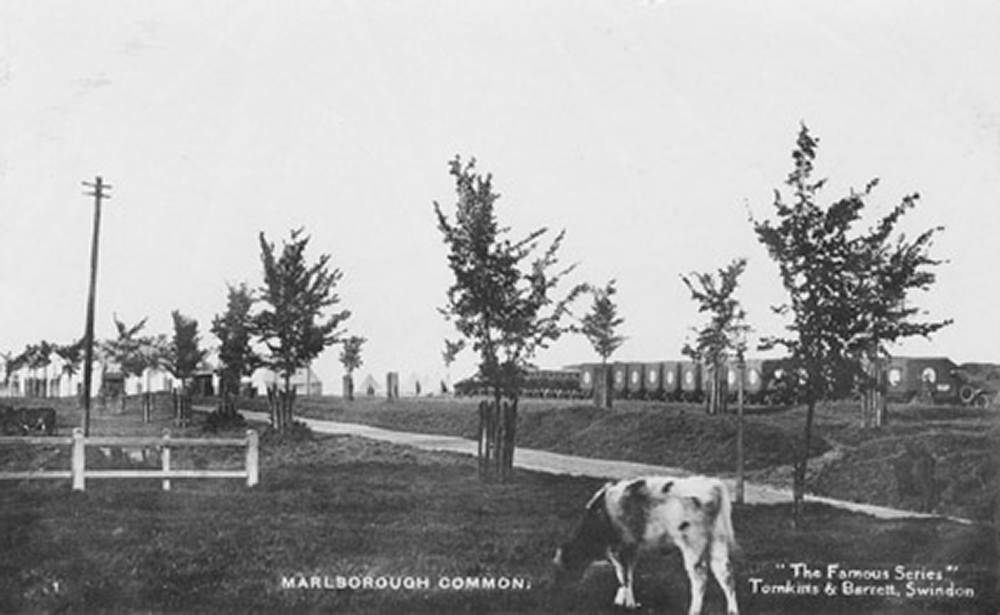
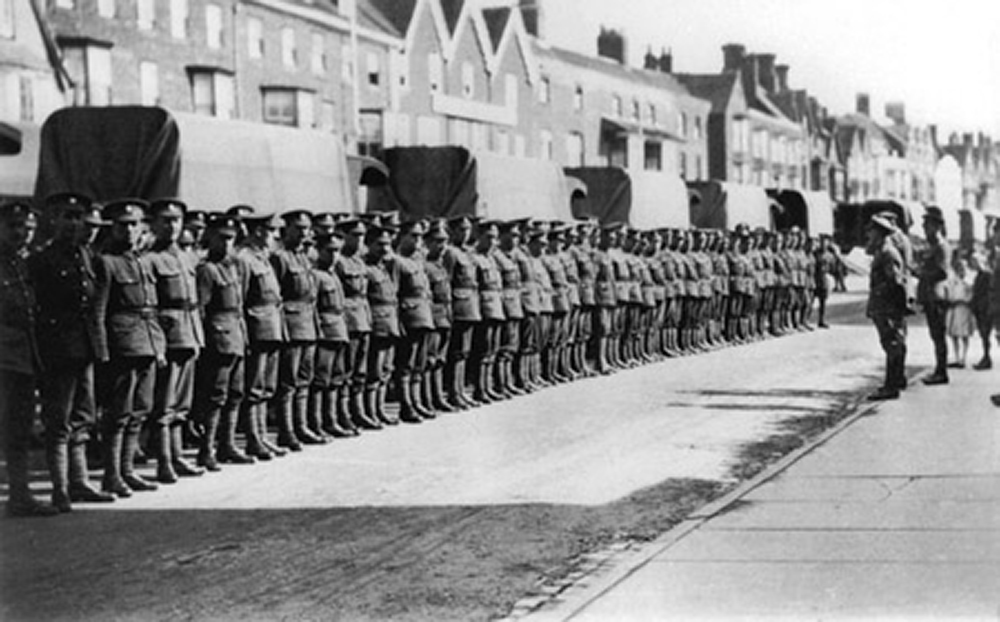
Men and machines from 881 MT Company ASC pictured during the early months of 1917 lined up along the northern side of Marlborough High Street. The vehicles are Ford Model T’s, but as their rear bodywork is partly hidden from view it is impossible to tell if they are vans or tenders55. More 881 Company Ford Model T vehicles in Marlborough High Street.
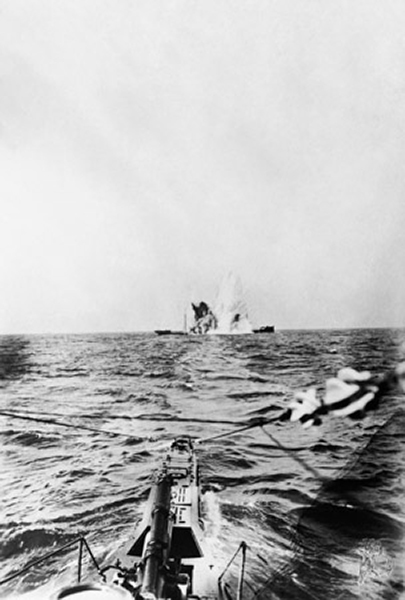 From the start, British warships undertook a tight blockade of Germany, leading to widespread starvation by 1918. In turn Germany tried to cut Britain off from the rest of the world using submarines. The steady loss of Allied ships, particularly in 1917, caused severe anxiety in Britain. But by collecting ships in protected convoys, Germany's attempt to blockade Britain was defeated.
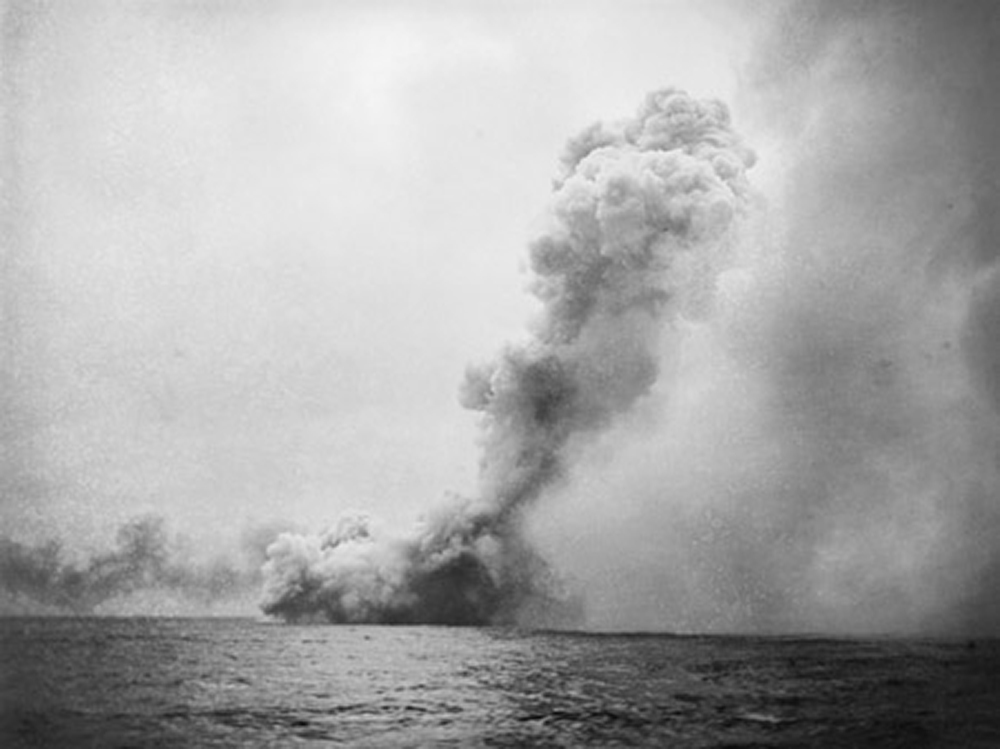 After a decade of anticipation, the public in Britain and Germany expected to see a titanic battle for control of the seas. In the end, only one major naval battle took place, off the Danish coast of Jutland on 31 May 1916. This photograph shows the end of HMS Queen Mary, which exploded and sank with the loss of over 1,200 men after being struck by German shellfire.
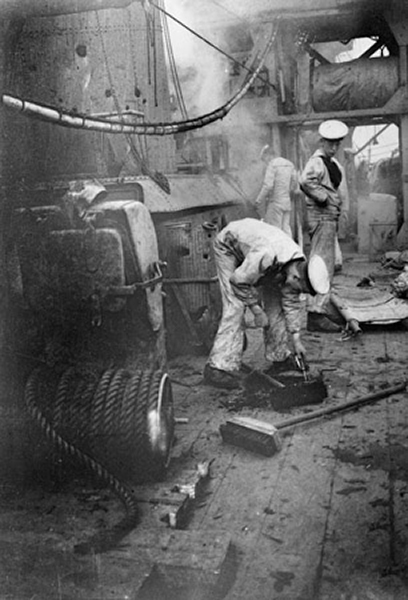 Since 1916 many have questioned 'Who won the Battle of Jutland?' More British ships were sunk and damaged than German, but the British fleet was soon repaired (like HMS Chester seen here) and ready for action by 3 June. In contrast, after its near escape, the German High Seas Fleet remained in port for the rest of the war, never again challenging Britain's control of the North Sea.
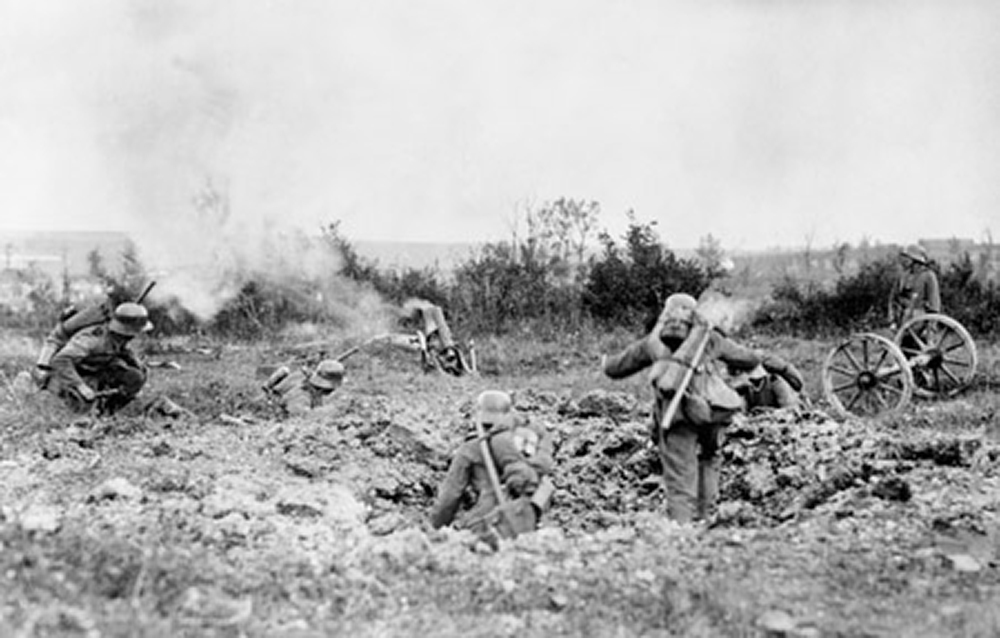 By 1918 many Germans were training in fast-paced, storm-trooper tactics (as seen here). On 21 March they launched the first of a series of powerful offensives against the Allied line in France. Over the coming weeks the Germans made significant advances, first against the British, then against the French. But they failed to break through the Allied line or make any major strategic gains.
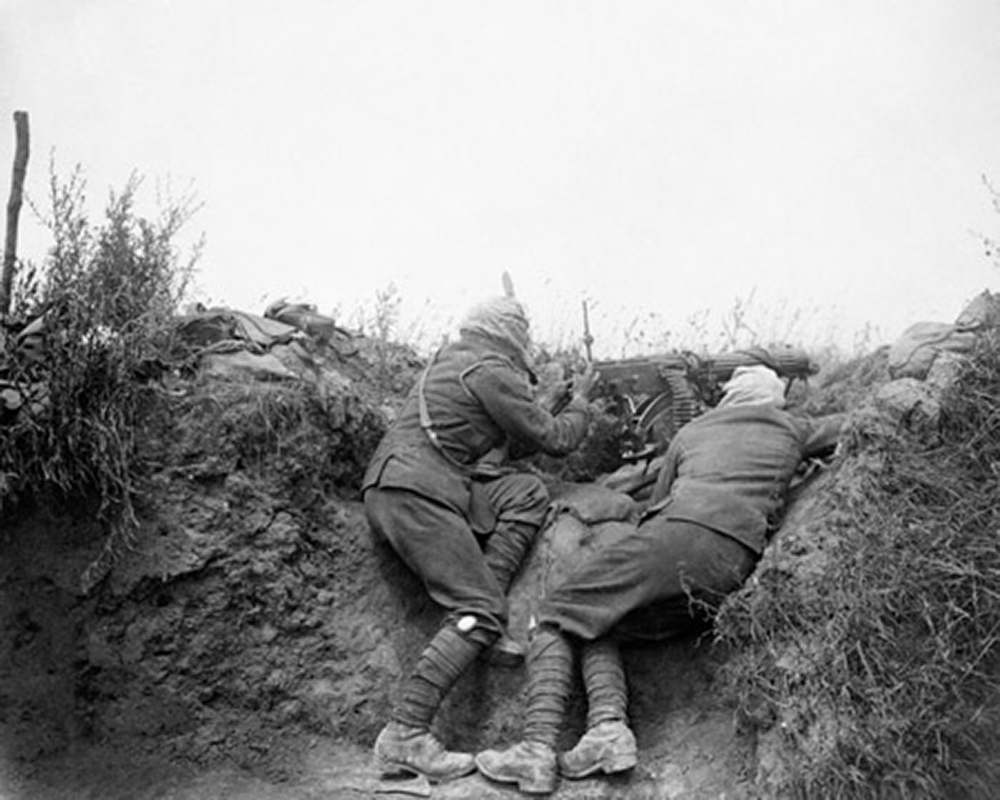 During the 1916 Battle of the Somme, both sides made extensive use of machine guns in defence and attack, like this British machine gun team firing near Ovillers in July. The result was heavy losses on both sides. The Somme caused the Germans even more casualties than the British, forcing them to build a strong, new defensive line to the rear which could be held with fewer men.

